Optional Setup: Printing Standard Labels to a Thermal Printer - Legacy
Note
ShipWorks version 5.18 or later now has a built in template that makes this process much easier. We recommend upgrading to the latest version of ShipWorks and follow the steps in this article instead.
ShipWorks makes it easy to configure separate printers as well as separate printer types (thermal and/or standard) for printing your labels, packing slips, reports and more. In some cases, it may be necessary to print shipping labels formatted for a standard inkjet or laser printer to a thermal printer.
As an example, if you use a Dymo 4XL thermal printer to print your shipping labels, you will need to format your labels as Standard, even though the Dymo 4XL is a thermal printer. Another example may be that your thermal printer is not printing correctly using ZPL or EPL settings. You could configure ShipWorks to send a standard formatted label to the printer.
The good news is that it only takes a few steps to configure this type of printer configuration.
This article will guide you through how to configure ShipWorks so that you can send standard formatted labels to your thermal printer.
The first step is to configure a label template that will format the standard label correctly for your thermal printer. Here's how:

2. Select the Label Standard template from the list of templates on the left side of the Template Manager screen. Then:
Click the Copy button.
Click OK
3. Select the copy you just created and click on the Edit button.
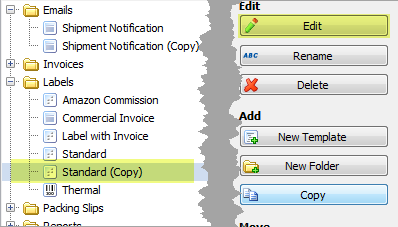
4. Name the template Standard 4 x 6.

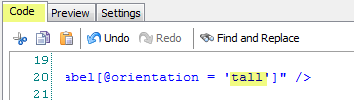
5. On the Code tab, scroll down in the code to line 20. It should read:
Change the word Wide to Tall, leaving rest of the code as is.
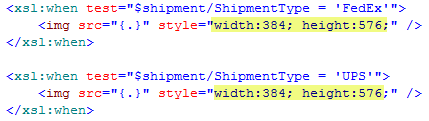
6. Optional- If you use FedEx and/or UPS:
Locate this block of code. It should be around line 32.
<xsl:when test="$shipment/ShipmentType = 'FedEx'">
<img src="{.}" style="width:576; height:384;" />
</xsl:when>


<xsl:when test="$shipment/ShipmentType = 'UPS'">
<img src="{.}" style="width:576; height:384;" />
</xsl:when>
-
Reverse the width and height dimensions so that the code reads:
<xsl:when test="$shipment/ShipmentType = 'FedEx'">
<img src="{.}" style="width:384; height:576;" />
</xsl:when>

<xsl:when test="$shipment/ShipmentType = 'UPS'"
<img src="{.}" style="width:384; height:576;" />
</xsl:when>
7. Click on the Settings tab and then on the Labels link.

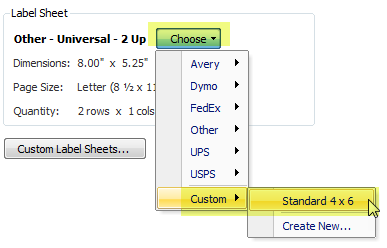
8. Click on the Custom Label Sheet... button. Then, click New. Next, name the sheet Standard 4 x 6 and configure the custom label sheet to match the image below.
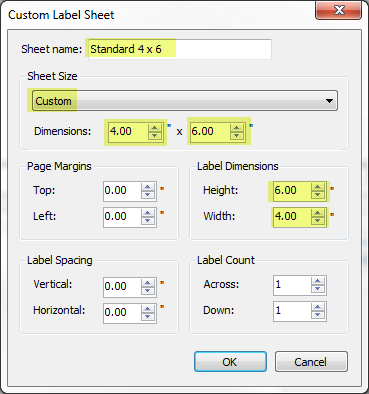
9. Click OK, then Close. Next, click on the Choose button and select Custom Standard 4 x 6.
10. Select Printing. Then, select your thermal printer from the list of printers in the Printer: drop-down menu.

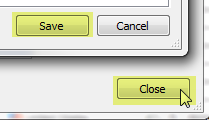
11. Click Save and then Close.
Now that you have the template configured, let's make sure that ShipWorks will request a label in the standard format from your shipping provider(s) when processing a label.
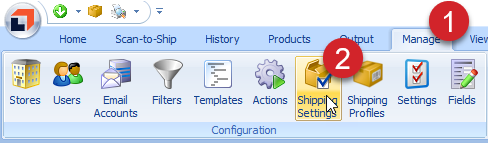
2. For each shipping provider that you wish to send the standard formatted label to your thermal printer, do the following:
Select the shipping provider from the list of providers on the left of the Shipping Settings screen.
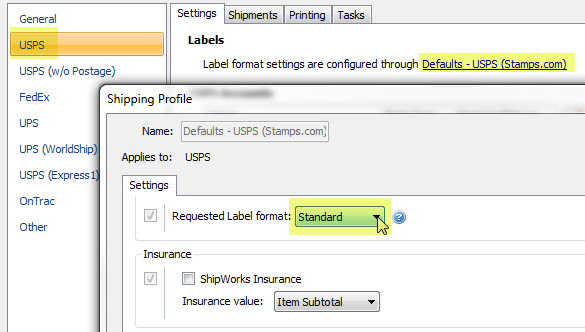
On the Settings tab, click on the the blue link Defaults - [shipping provider name].
Scroll down to the Labels section and select Standard from the Requested label format: drop-down menu.
Click OK.
The last step is to set your shipping providers' printing rules to point to the Standard 4 x 6 template we created earlier.
2. For each shipping provider that you wish to send the standard formatted label to your thermal printer, do the following:
Select the Printing tab.
From the Otherwise always print with drop-down menu select the Labels Standard 4 x 6 template.

3. Click Close to exit the Shipping Settings screen.
Now, when you process a shipping label for the configured shipping providers, ShipWorks will request a Standard label, format it for and print it to your thermal printer.
Still Need Help?
Please feel free to reach out to one of our awesome Technical Support Representatives in St. Louis. We are happy to help.
Have a comment to share about this article? We'd love to hear from you. You must be logged in to your Support Portal account to leave a comment.
Comments
0 comments