Reprinting a Label with a Barcode Scan
ShipWorks Scan-to-Ship gives you the ability to streamline your shipping process by searching for orders, weighing packages, applying shipping profiles, processing labels and more with a barcode scan. As of ShipWorks version 7.9, you now also have the ability to reprint a shipping label for orders that have already been processed.
This article will guide you through how to reprint a shipping label with a barcode scan and how to configure ShipWorks to reprint a shipping label for processed shipments as the default action.
This article assumes that:
You have a barcode scanner registered with the ShipWorks software and have enabled automatic printing of shipping labels on a barcode scan.
When you scan a barcode to load an order that has already had a shipping label created you will be prompted by ShipWorks. You will be asked what action you would like to take for the order. You have the option to:
Reprint Existing Label
Create New Label
Cancel
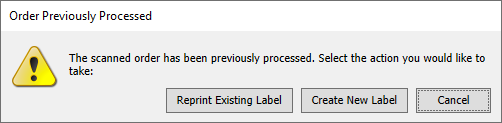
Click on the Reprint Existing Label button to have ShipWorks reprint the label for you.
Note
If the order has multiple processed shipments, the label will be printed for the most recently processed shipment.
If you would like to configure ShipWorks so that you do not have to click Reprint Existing Label, you can set this as the default action when scanning an order that has already had a label processed. Here's how:
1. Click on the Manage tab, click the Settings button and then select Scan-to-Ship.
2. Click the drop-down menu for Default behavior when scanning a previously processed order: and select Print Existing Label.
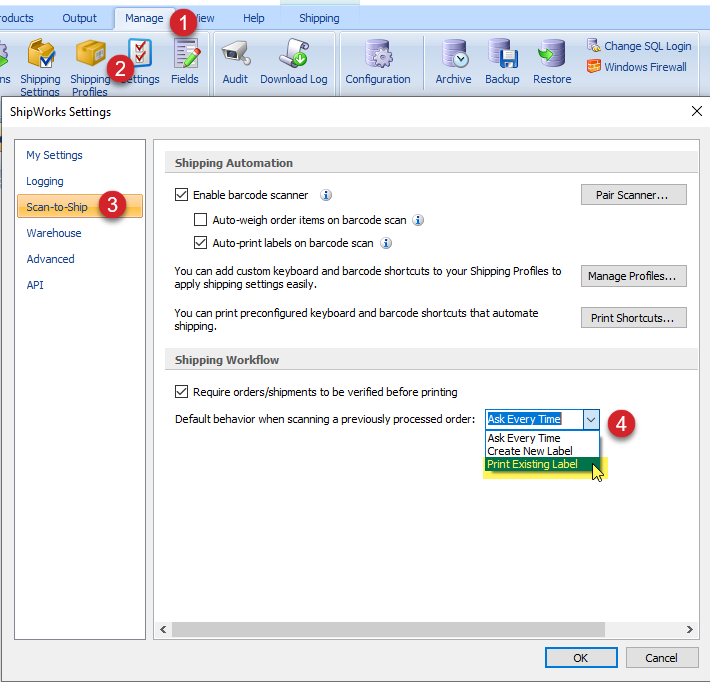
3. Click the OK button to save your selection.
From now on, when you scan an order, ShipWorks will automatically reprint the shipping label for orders that have already been processed.
Still Need Help?
Please feel free to reach out to one of our awesome Technical Support Representatives in St. Louis. We are happy to help.
Have a comment to share about this article? We'd love to hear from you. You must be logged in to your Support Portal account to leave a comment.
Comments
0 comments