Creating a Return Label with OnTrac
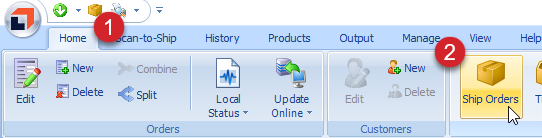
1. Select the order to be returned. Then, click the Home tab then the Ship Orders button.
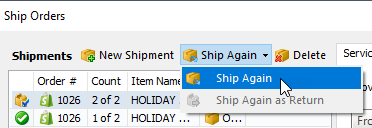
2. Click Ship Again above the list of shipments to the left and select Ship Again. (You may notice a grayed-out option to "Ship Again as Return." That is an automated feature that's not available with OnTrac, but no worries, we'll walk you through the OnTrac return process right here). Notice a new copy of the shipment will appear in the middle of the Ship Orders window.
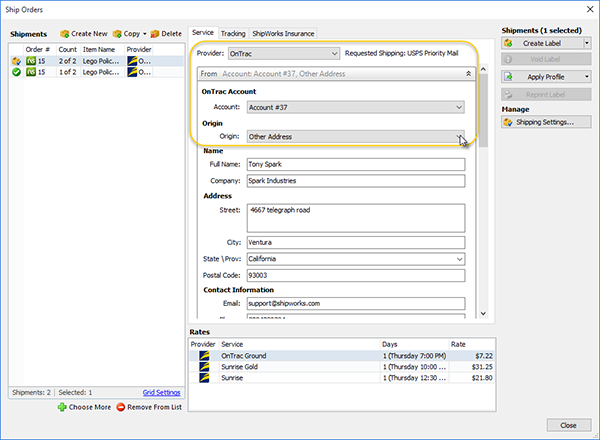
3. In the Service tab, make sure OnTrac is selected as the shipping provider, and then in the "From" section, open the Origin dropdown and select Other Address.
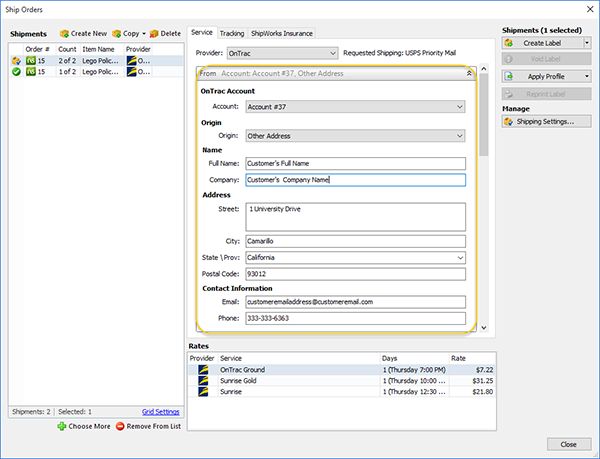
4. Enter the customer's address information to create a Return label coming from the customer address. (It's probably easiest to cut and paste their address info from the original label's "to" fields).
5. Scroll down to the "To" section and enter your returns processing address into the "To" address fields. (You might need to use the use the down arrows in the section's title bar to expand the To section).
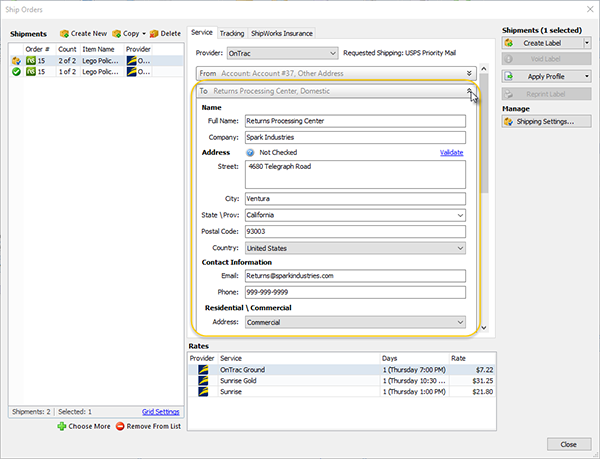
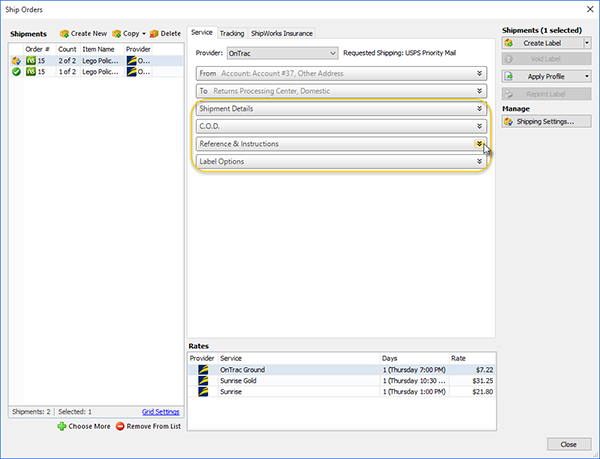
6. Verify that the information in all other sections of the Service tab are accurate. (Use the up or down arrows in the section title bars to close or expand a section).
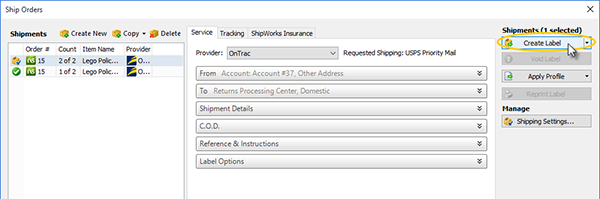
7. Click the Create Label button.
Still Need Help?
Please feel free to reach out to one of our awesome Technical Support Representatives in St. Louis. We are happy to help.
Have a comment to share about this article? We'd love to hear from you. You must be logged in to your Support Portal account to leave a comment.
Comments
0 comments